
In FINSYNC, each invoice line item is derived from your catalog of services or inventory items. Each line item can optionally carry attributes — Location, Department, and Associate — which can be factored into your financial reporting to better understand your company's performance. To learn more about Attributes, see Overview of Attributes (Classes).
You can add attributes to invoice line items when creating a new invoice or editing an existing one. The steps below cover editing an existing invoice. To learn how to add attributes when creating a new invoice, see How to Create and Send an Invoice.
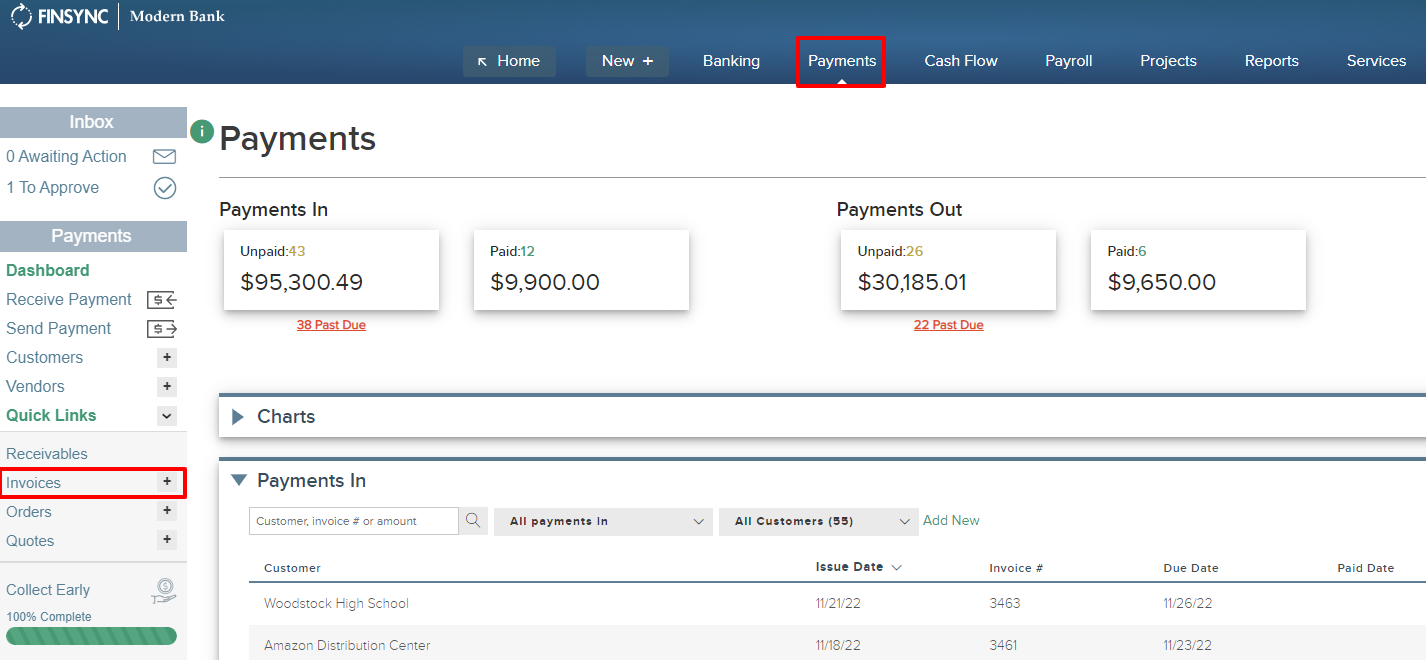
1. Select Payments from the top menu, then select Invoices from the left menu.
2. Select the existing invoice you want to edit. Select Options in the top right corner, then select Edit from the dropdown list.
.png?width=688&height=321&name=Screenshot%20(22).png)
Note: You can only make edits to open (unpaid or unmatched) invoices. If you need to add attributes to a paid invoice, see How to Edit Paid Invoices.
3. On the Edit Invoice page you will find the ability to add attributes to the line items of the invoice. This is indicated by the  icon located on the far left of the item row.
.png?width=688&height=401&name=Screenshot%20(23).png)
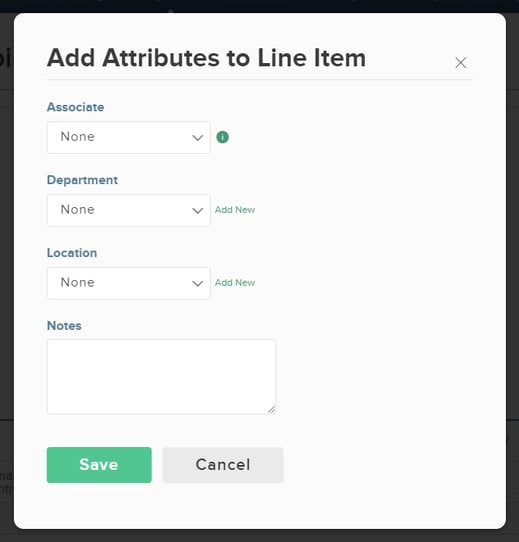
4. Selecting the icon lets you associate that line item with an Associate (an employee), a Department (selected from your list of departments), and a Location (selected from your list of locations). Note: Departments and Locations must be created in FINSYNC before they appear in these lists.
5. Select Save to add your attributes and return to the invoice.
Related Articles:
Overview of Attributes (Classes)
How to Create and Send an Invoice