The process to edit/select who receives Invoices and Payments is outlined below:
The email address to which you first send an invoice/payment, and which is used to create the free FINSYNC account as described above, will continue to receive future invoices/payments. But there are ways to have additional people receive invoice and payment notifications.

Option 1: Add more contacts to your customer records
1. Mouse over Payments in the top menu and select Income.
2. Select Customers found in the menu on the left.
.png?width=688&height=239&name=Screenshot%20(28).png)
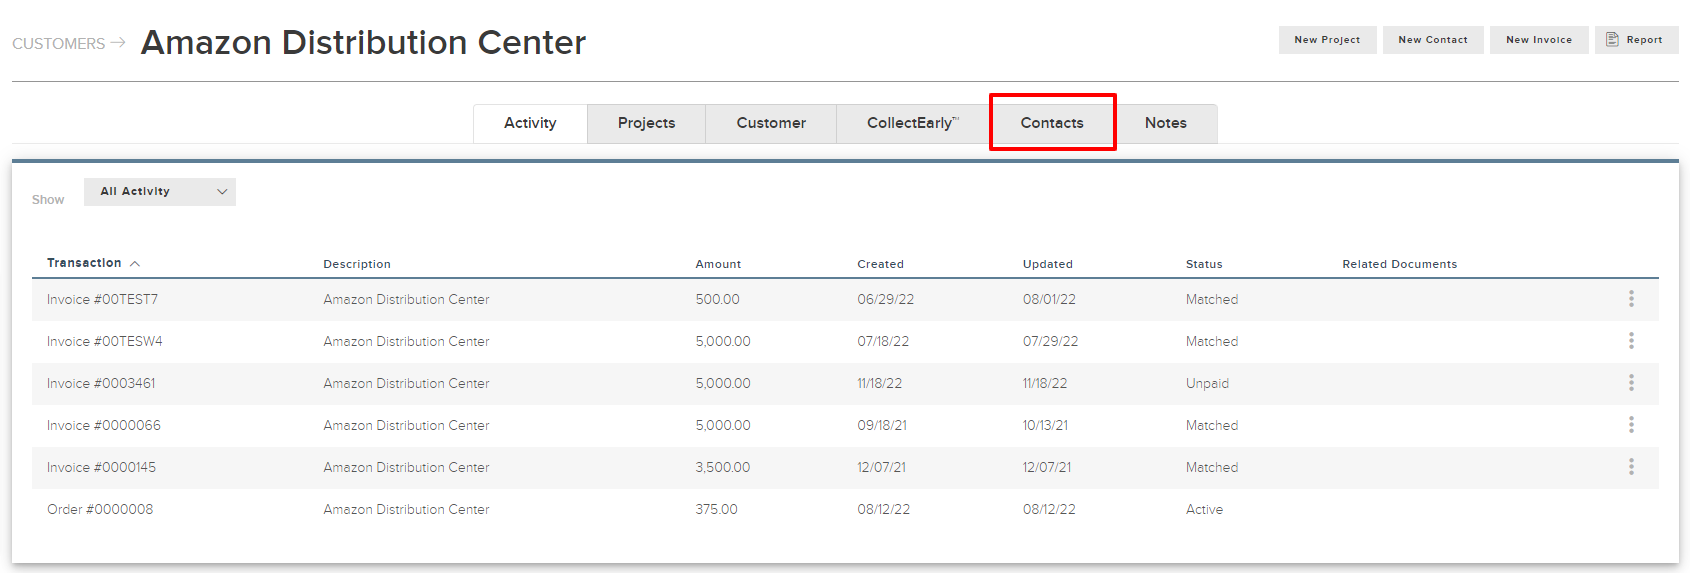
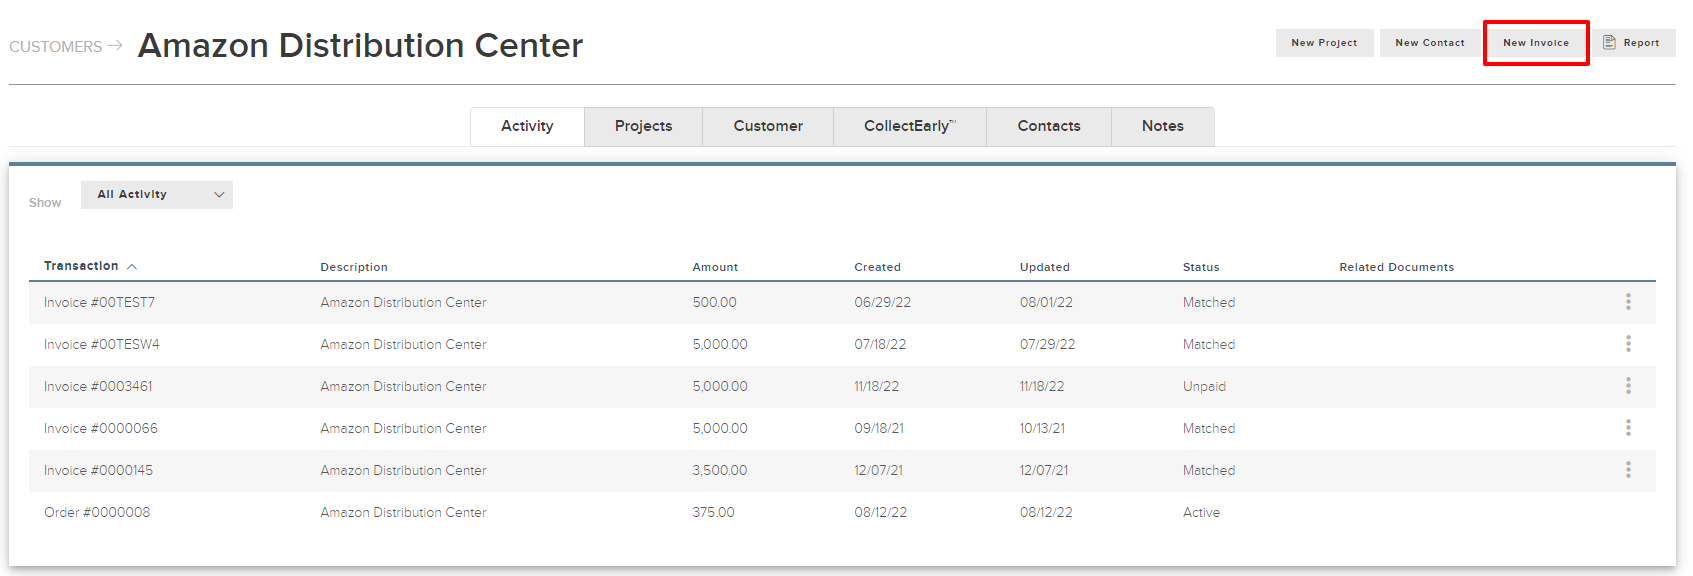
3. Select a customer record, then select Contacts.
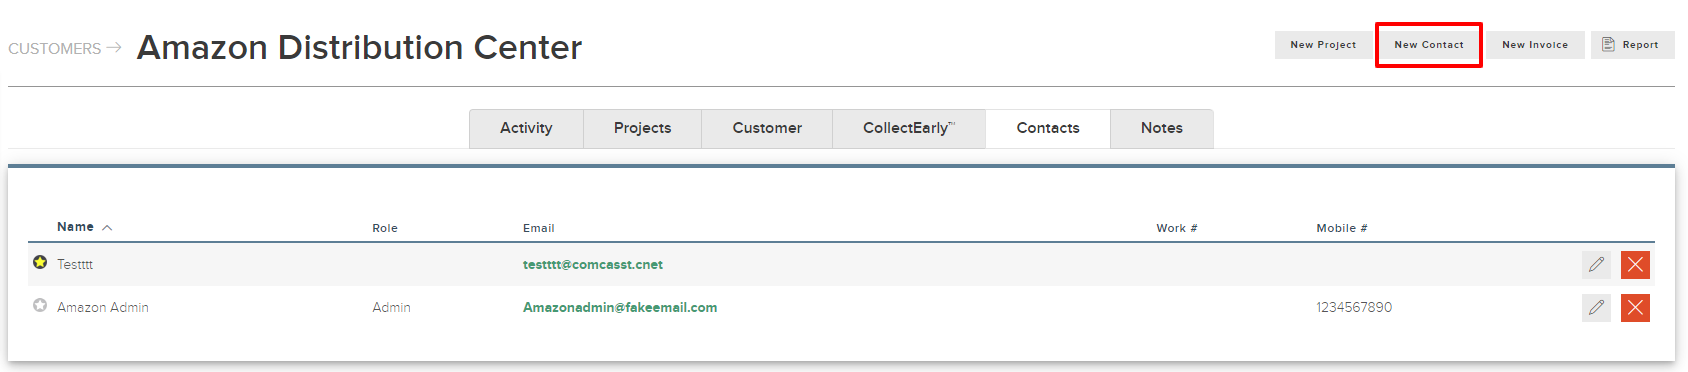
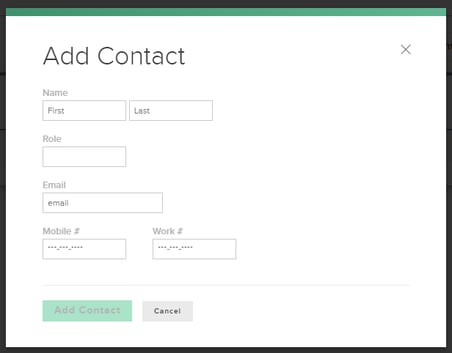
4. Select New Contact and create a new contact record, with email address, for each person to receive invoice notifications.
5. Select New Invoice, fill in the details and choose Save and Send at the bottom.
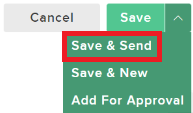
6. When sending invoices, select the additional contacts to be copied on the notification.
Option 2: Have your customer or vendor invite other users (this is only possible for your customers if they have set up a Limited Account with FINSYNC).
1. Have your vendor or customer log into FINSYNC.
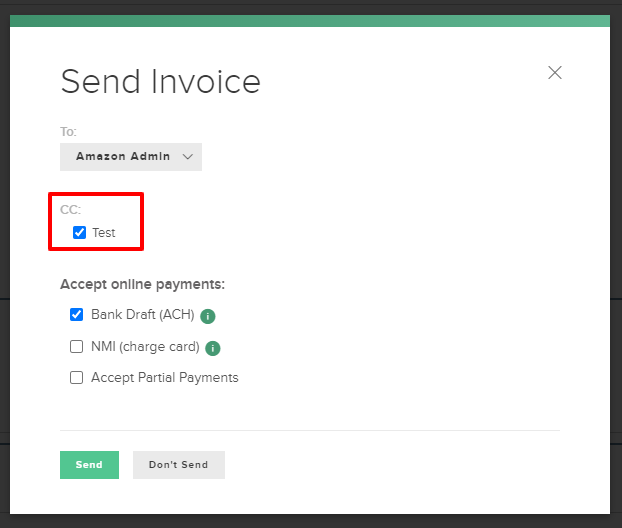
2. Mouse over the Company Profile Icon near the top right of your screen and select Account Settings.
.png?width=317&height=326&name=Screenshot%20(30).png)
3. Select Sharing from the menu on the left.
4. Mouse over Invite and select User.
.png?width=299&height=293&name=Screenshot%20(31).png)
5. Select a user from the drop down or choose Add New to enter the name and email address of the person to receive invoice or payment notifications.
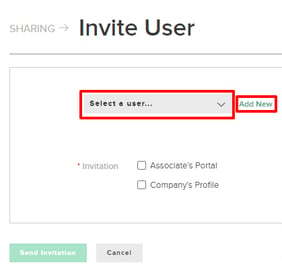
7. Select Company's Profile as the Invitation type.
8. Select the permissions for the new user.
For example, if the new user will be receiving and paying invoices, they will need Manage access to Expenses. Simply click Manage to enable this permission.
9. Select Send Invitation. The new user will receive an email invitation, allowing them to create their own login and to receive future invoice or payment notifications.
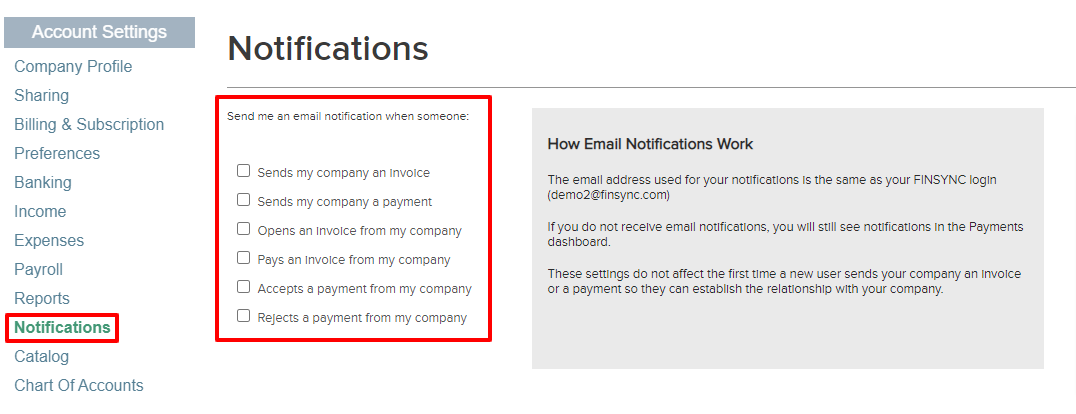
Managing Invoice and Payment Notifications
Both you and your customer or vendor can manage the types of email notifications received.
1. Log into FINSYNC.
2. Mouse over the Company Profile Icon near the top right of your screen and select Account Settings from the menu.
4. Select Notifications from the menu on the left.
5. Select the types of email notifications you want to receive.