Navigate to app.finsync.com/mobile from your mobile browser.
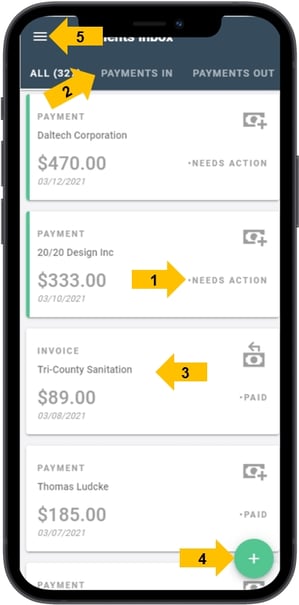
Use your FINSYNC login to sign into the mobile payments app. You will see the "Inbox" view when you sign in, which lists all of your payment activity, including payment requests you've sent and payments you've received.
Payments Inbox
|
 |
Send an Invoice
- Select the
 button and then Send an Invoice.
 - Select a customer who is to receive the invoice, or create a new customer record.
- After your customer has been selected you can either:
- Enter the exact amount of the invoice.
- Under the Edit Items: select from your catalog of services and items (which have associated prices) that you are invoicing for and these will reflect as line items in the same way as done from the desktop version.
- Set a due date for payment.
- Enter a description of up to 1,000 characters.
- Select the methods of payment you'd like to accept.
- Enter an invoice number if you are using manual invoice numbering, or if you'd like to override the automatic invoice number.
When you submit your request, an email notification is sent to your customer. By clicking the link in the email, your customer is able to view the full details of your request and make a payment, or reject the request.
Take a Payment
You can now take payments in real-time from customers using credit/debit cards.
- Select the button and then Take a Payment.
- If you have not set up either NMI, Stripe or Banc Card for collecting payments via charge cards, you will be prompted to do so from within the Mobile application. The ability to set up these payment options can also be accessed from with the full application. To do so, select your INCOME tab underneath PAYMENTS. Next select the SETTINGS tab and find the ACCEPT PAYMENTS section and follow subsequent prompts.
- Select a customer who is being billed.
- Enter the exact amount or select from your catalog of services/items that have associated fixed pricing.
- Enter in the payment information of the card the customer is paying with.
Send Payment
Payments can be made from your bank account and sent to anyone using only an email address.
- Select the button and then Send Payment.
- Select a vendor who is to receive the payment, or create a new vendor record.
- Enter the amount of the payment to be sent.
- Set the date on which the funds are to be received.
- Enter a description of up to 1,000 characters.
- Choose the bank account from which to make the payment.
- Select Submit.