Note: The below information will be listed differently if the employee/contractor is classed as a 1099 or W-2 employee. This variation will be seen once you have selected a Tax Treatment on the associate record.
Note: FINSYNC uses the term "Associate" for both a W-2 (employee) and 1099 (contractor) team members.
Follow the steps outlined below to add an Associate in FINSYNC:
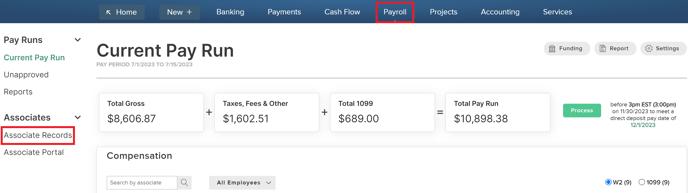
1. Click on Payroll from the top menu and click Associate Records.
2. Click the green New Associate button on the right.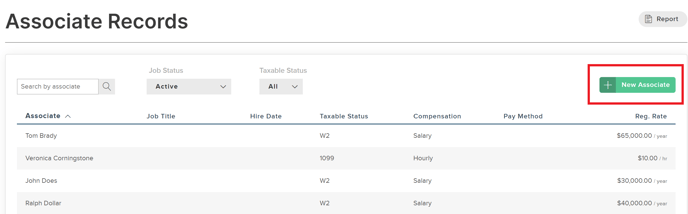
Requirement information when adding new associates:
Note: The information required may vary depending on the Tax Treatment classification of 1099 or W-2.
- Name: Legal name on Social Security card. Nicknames are not acceptable.
- Street Address: No P.O. Boxes. The IRS requires a physical location.
- City, State & Zip Code
- Phone Number: (Optional)
- Email Address: Required for associates to log time directly and download their own paystubs
- Gender
- Hire Date
- Employee Status: Set to Active for any active associate
- Job Title
- Department: Optional, use this if your company has departments set up.
- Location: Optional, use this if your company has locations set up.
3. Enter the requested information throughout all three sections.
- Select the Tax Treatment (W2 Employee or 1099 Contractor)
- By checking the box below the email address, your associate will receive an invitation to the Associate Portal. For additional information on the Associate Portal, click (Here).
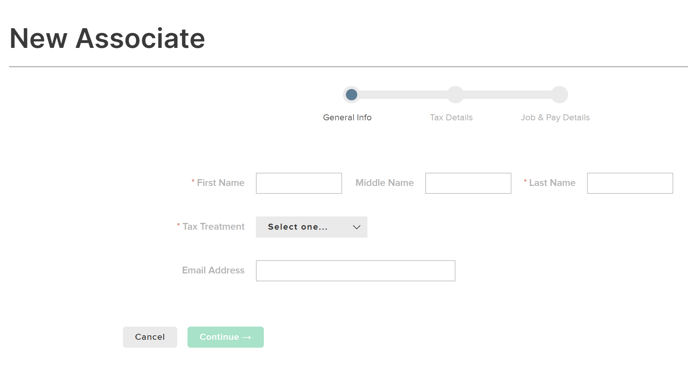
4. You will be prompted for additional details based on the specific Tax Treatment selected. Complete these details and click the green Continue button.
The primary difference in adding a W2 Employee vs. a 1099 Contractor is that for W2 employees, you will be asked to include tax information as a middle step.
5. Once you have filled out the required information, click Continue to move to next section. For W2 employees, the next section will be Tax Details. For 1099 contractors, you will move directly to Job & Pay Details.
6. For W2 employees only, you will be directed to fill out the Tax Details page, then to the Job & Pay Details page.
Note: For 1099 employees, you will go directly to the Job & Pay Details page.
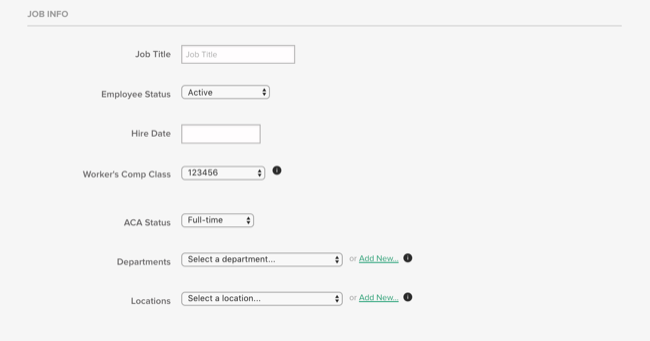
7. In the Job Info section, enter the following information:
- Job Title
- Employee Status (active, inactive, on leave of absence, or terminated)
- Workers compensation class
- ACA Status (includes variable-hour and seasonal employment)
- Department within which the employee works (for your own business reporting and analytics)
- Location where the employee works (for your own business reporting and analytics)
8. Under Pay Details, indicate whether the employee is paid at an hourly rate or by salary. For 1099 contractors, an hourly rate is set by default.
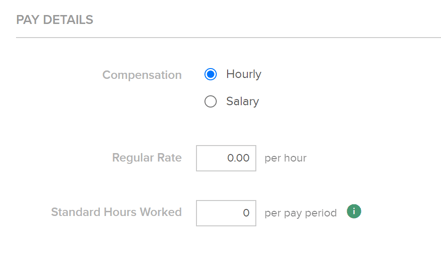
9a. If hourly, enter the Regular Rate per hour. If an employee is guaranteed a set number of hours per pay period, you may enter that amount in Standard Hours Worked.
Note: The Standard Hours Worked amount will be added to the associate's time-sheet automatically as planned hours (as opposed to daily time-tracking). This means, that any time logged using the Time-Clock will be overridden by the Standard Hours amount. It will also reconfigure manually entered time into the Time Sheet to evenly distribute across the days of the Pay Run.
With the above being the case, we recommend leaving the Standard Hours section at a 0.00 value.
Note: If the employee is off the job and other pay such as PTO, Sick or Disability, you will need to correct the hours or they will be paid for the guaranteed hours as well as the other pay types.
9b. If salaried, you may enter the rate by year, month, week or day. Yearly is the most common, and the system will calculate the amount of pay per pay cycle by your pay frequency.
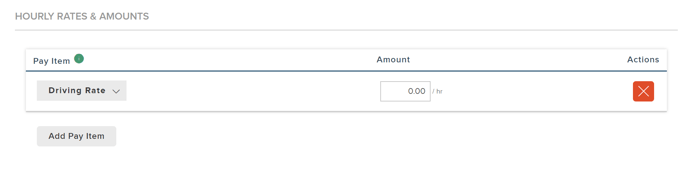
10. Custom rates may be created for special circumstances such as Double Pay for holidays. It is not necessary to create a rate for Overtime. The system will automatically pay time and a half when Overtime is entered.
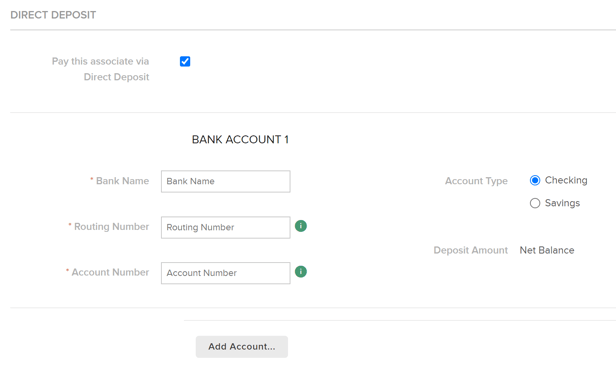
11. Under Direct Deposit at the bottom, if the employee has already given their banking information, it can be entered once you check the box. If not, do not check the box to pay by Direct Deposit.
12. Click Save at the bottom.