Creating projects in FINSYNC is a great way to find out how much money you made on a particular job. We use the term Projects as a catch all for a series of tasks and expenses with a defined beginning and end. One of the best ways to track profitability on projects is by utilizing the task-based billing feature.
In order to begin setting up projects with task-based billing, follow the steps outlined below:
1. Click on the Projects tab in the top menu.
2. Mouse over New and select Project.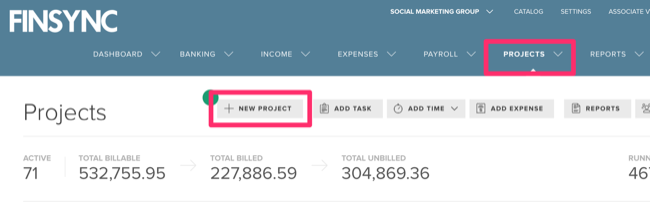
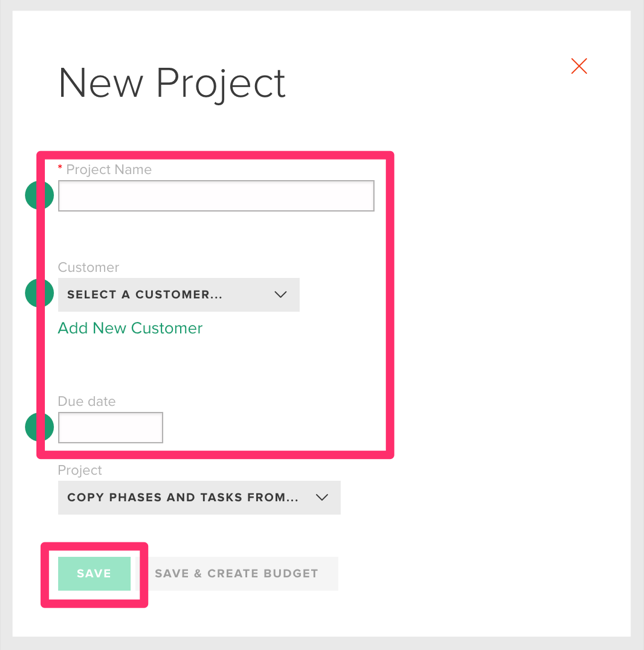
3. Name your project, choose the customer (or add a new one), set a due date if desired. You can designate an address with the location.
Note: Do not change Copy Phases and Tasks From... menu. This tool will be useful after you have created multiple projects that are in the standard formats used by your business.
4. Click Save.
Note: Setting a Budget is optional. If not set up front, it can always be changed later.
5. Set up a Phase which helps you group tasks together for billing purposes. If you do not have multiple phases for this project, you'll just need to set up one phase. Click Create the first phase.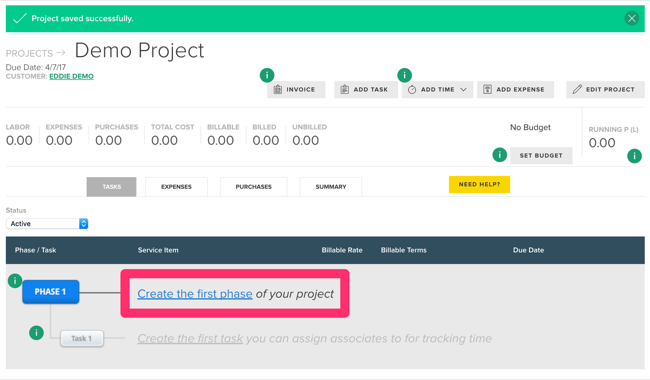
6. Choose the name for the project phase, and be sure to leave Billing Options set to Set rates at the task level. Set a due date if desired and click Add Phase. You now have a phase (or project if this is single phase) to which you can assign tasks, track time, expenses and purchase orders.
7. Now you need to add Tasks which are what your team members are assigned to complete. Click Create the first task.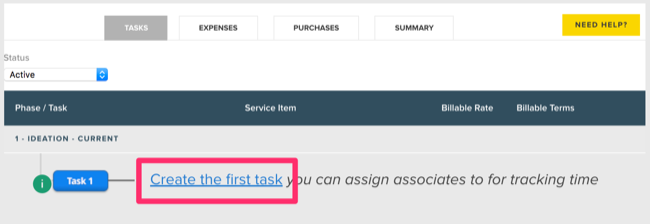
8. Give the first task a name. This is what your team member will see when they log in to the Associate's Portal to track time.
9. Your phase will already be selected because you only have one.
10. Select the way you want to bill this task. You can choose hourly, fixed or not to bill for this task.
Note: When your team members track time to an unbilled task, they will increase the cost to your delivery of the project, but will not increase your profit.
11. Choose a Service from your service catalog and the default price will populate the Hourly Rate field.
Note: You can override the price without editing the service catalog item permanently.
12. Assign a Due Date if desired.
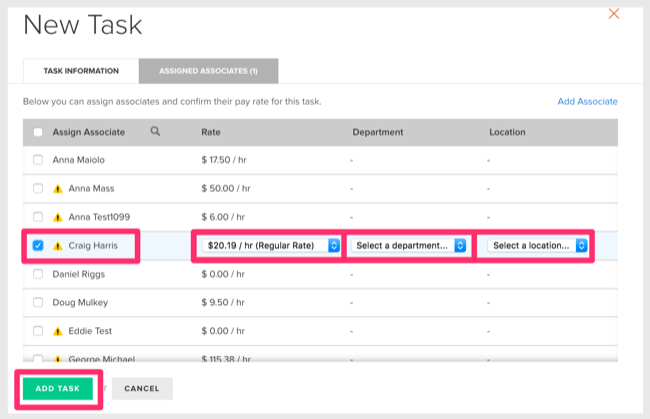
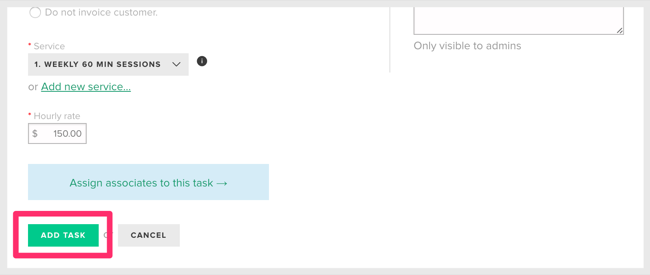
13. If desired click the Assigned Associates tab to immediately send the task to an associate, and continue to follow the next steps. Otherwise, you can click Add Task and you will be finished.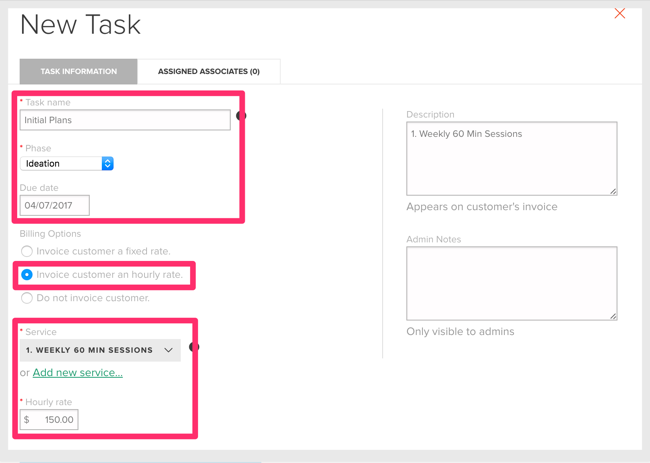
14. Choose your team members that should be able to work on this task.
15. Choose a Department and Location if desired. These Attributes will be useful for your business analytics and reporting.
16. Click Add Task.