Creating and sending a Quote allows you to send your customer an estimate and details related to specific services and/or products.
Follow the steps below to create a new quote and send to a customer:
1. Select Payments from the top menu.
2. Select Quotes located in the menu on the left.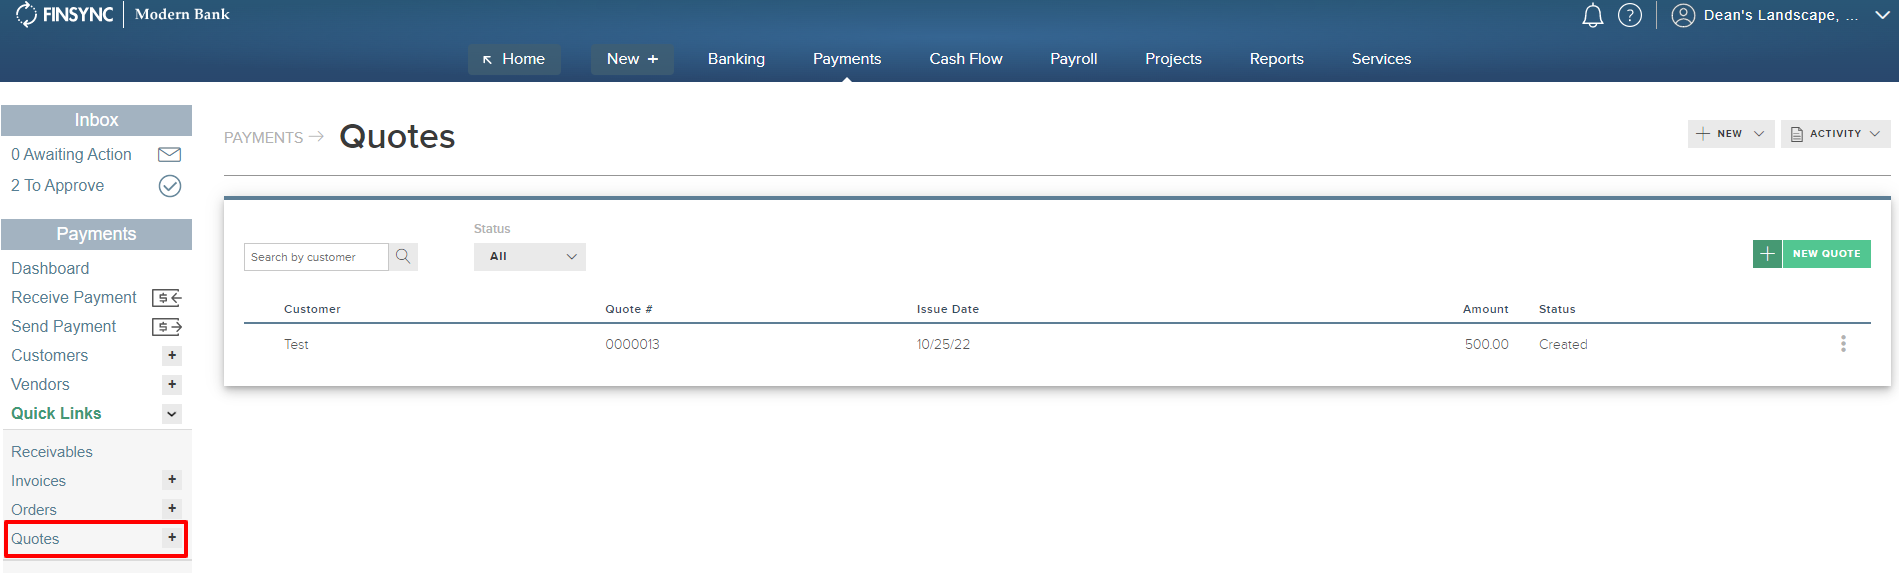
3. To create a quote, select the "+" to the right of the word quotes from the menu on the left. You can also select the green New Quote button on the right side of the screen.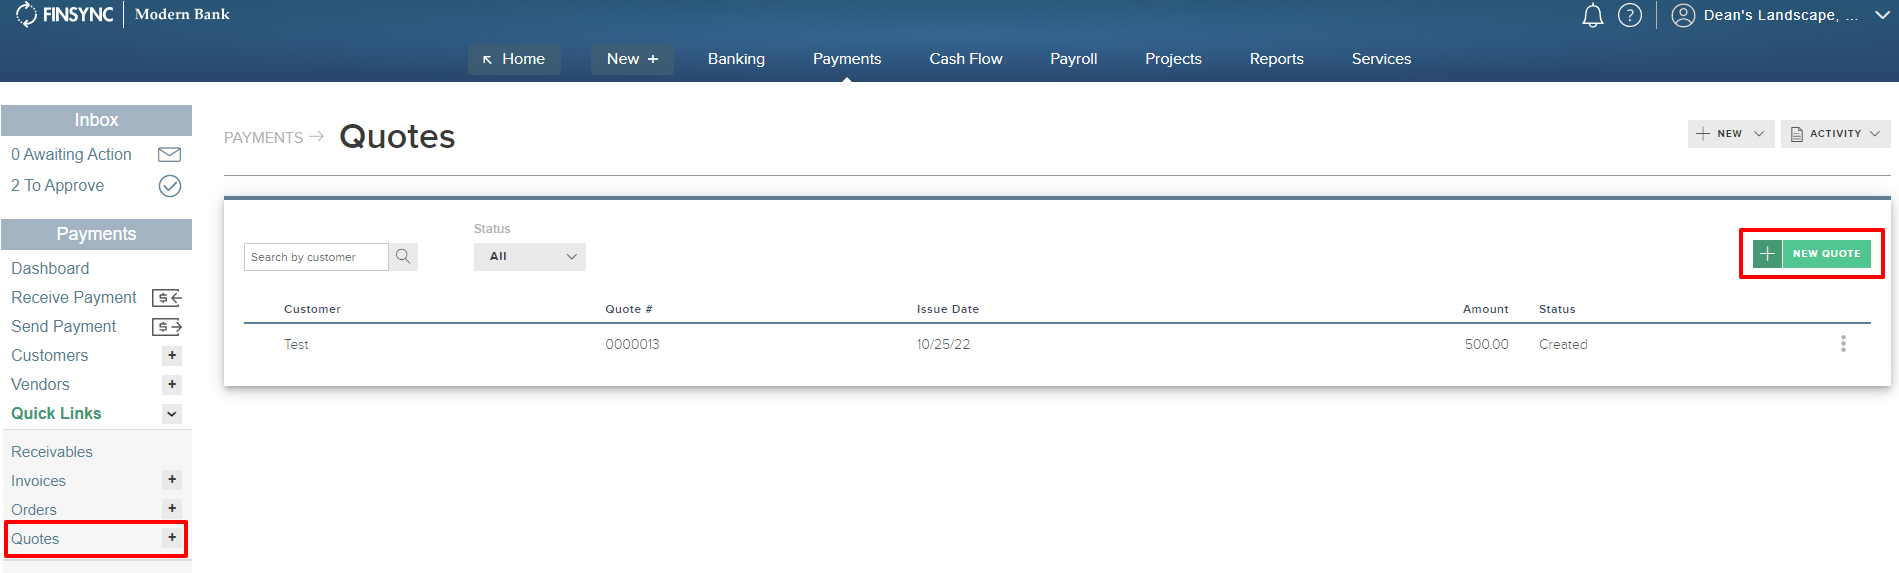
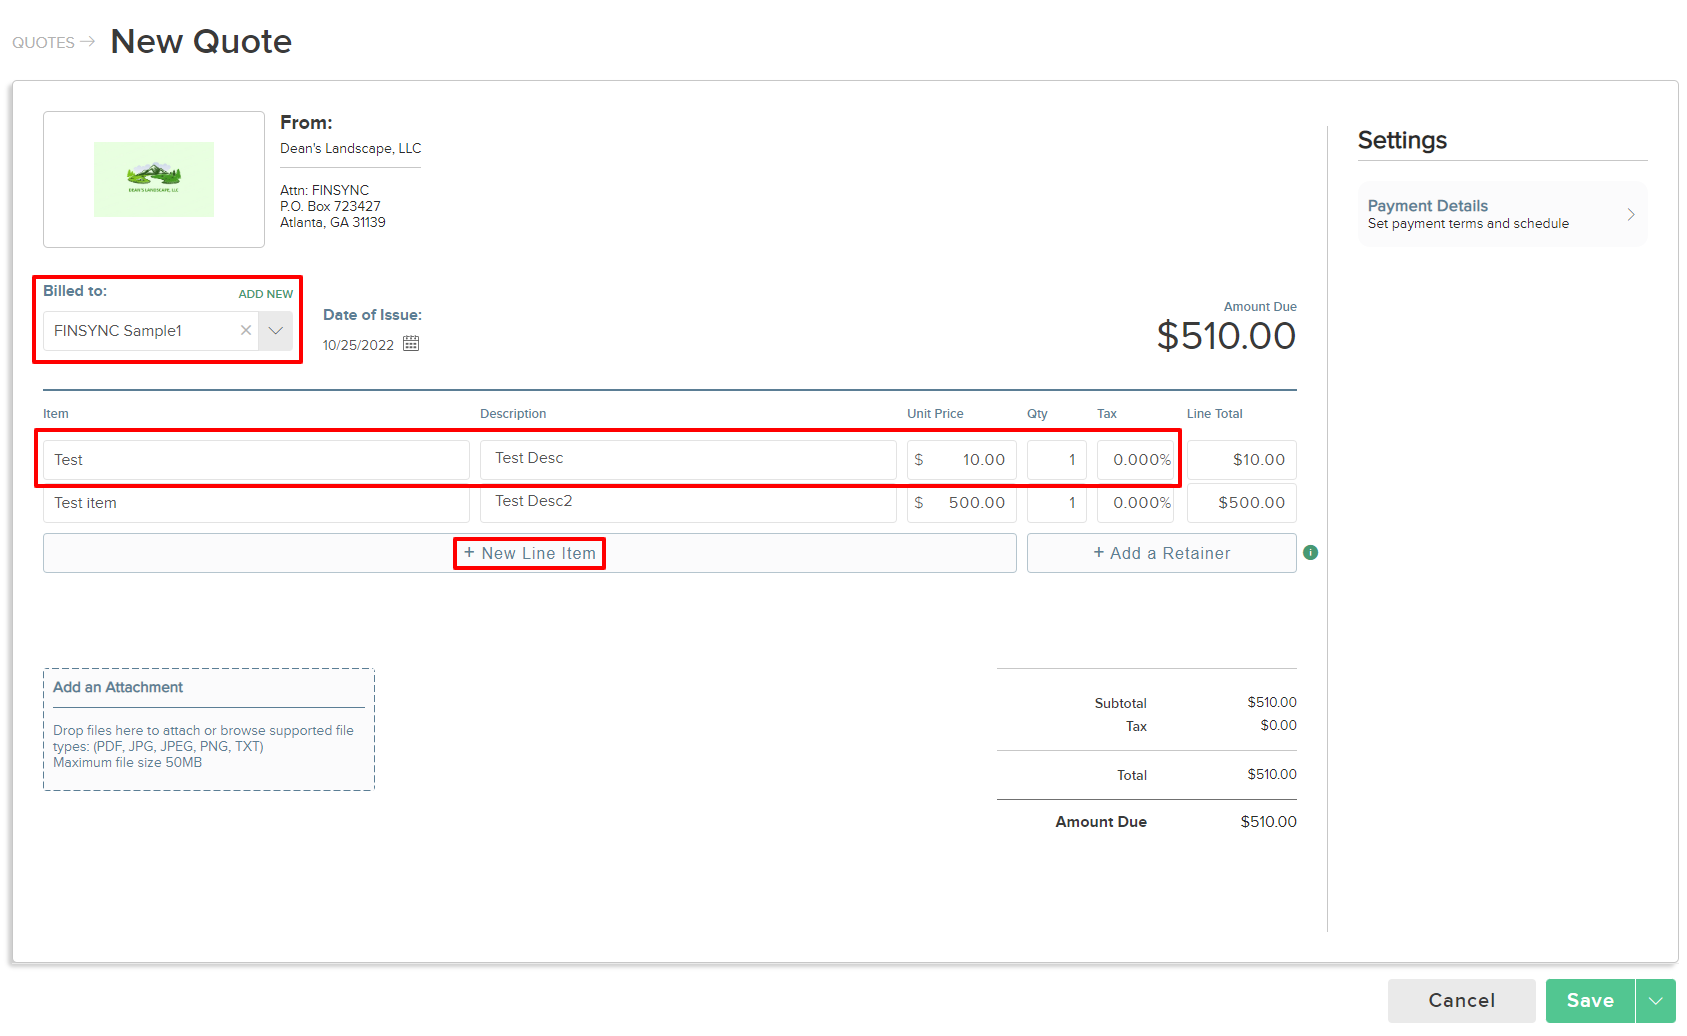
4. On the new quote, complete the necessary fields:
Select the designated customer from the Customer drop-down.
Note: New customers can be added using the ADD NEW link above the Select a Customer drop down field. You can also add new customers from the Customer link on the left menu. Details can be found in the article: How to Create New Customer Profiles.
Enter the line items for this quote, including the item, description, unit price, quantity and tax (if applicable). Note that the items in the catalog will automatically appear when typing in the Item field. Select the NEW LINE button to add additional lines.
Note: New Catalog items can be added while entering items on an invoice. You can also add and organize catalog items, directly catalog for ongoing use in quotes and invoices. Details can be found in this article: How to Manage Catalog Items.
5. Update any additional settings for the quote, such as the payment terms, customer reminder, and additional notes. You can access these settings in the Payment Details on the right side of the quote.
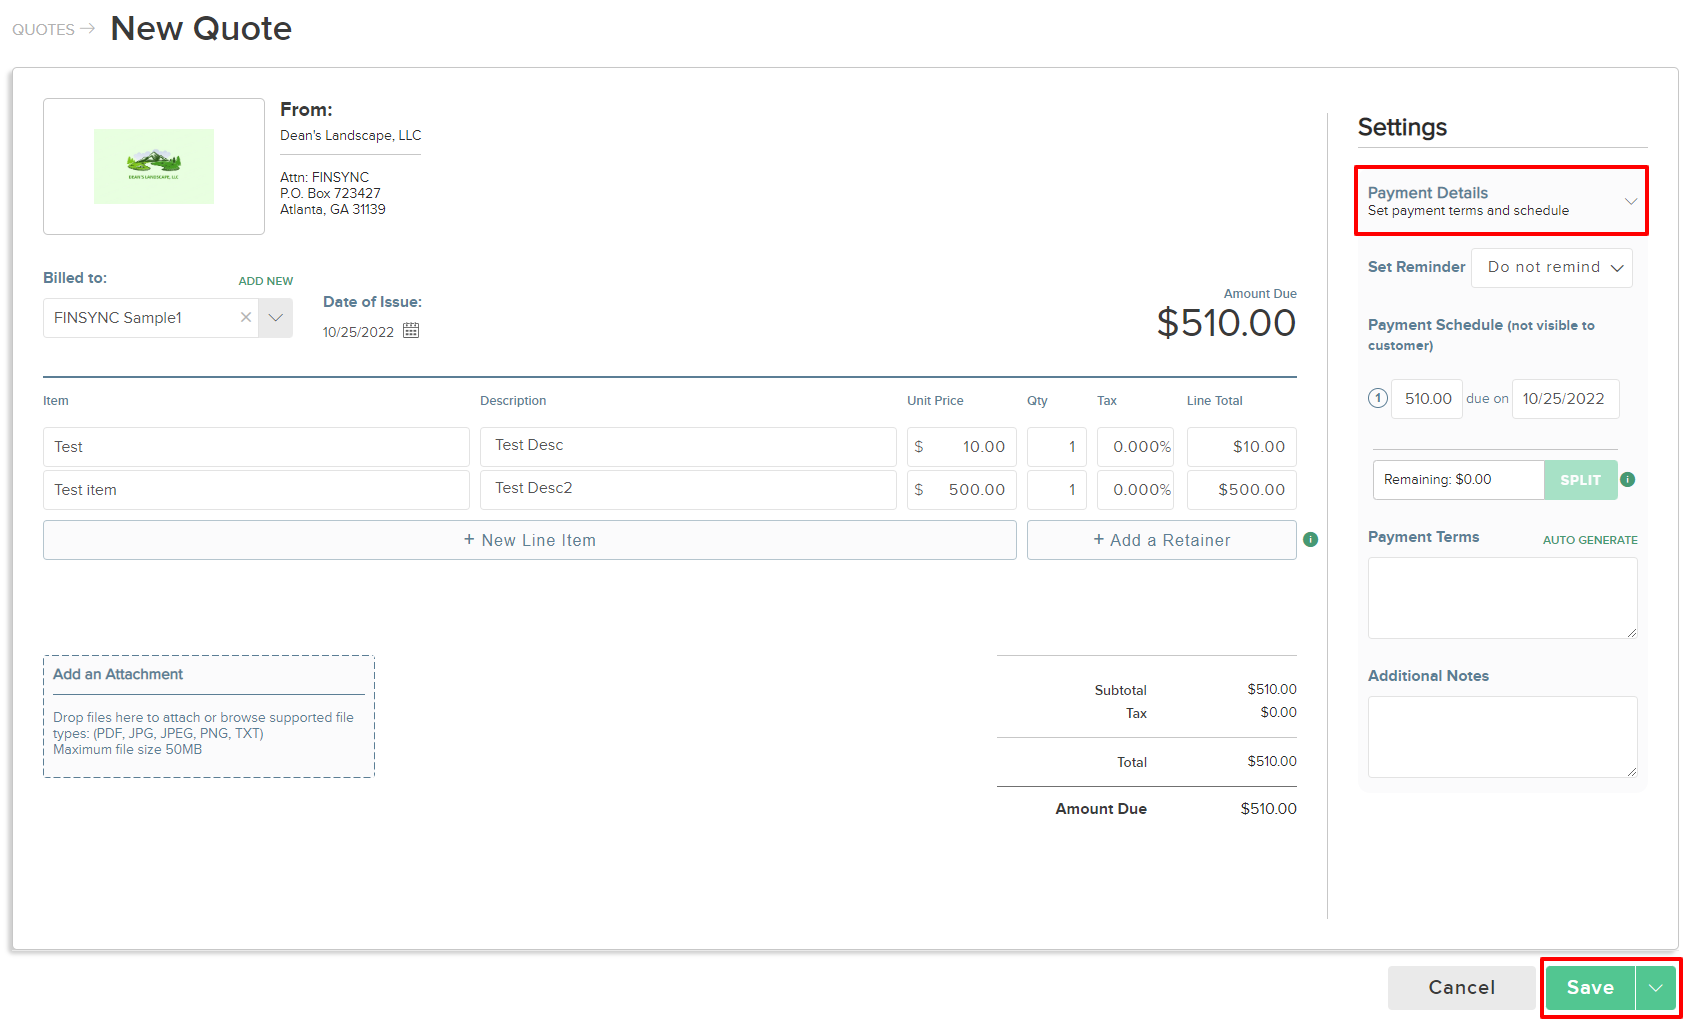
When ready, select the drop down menu option to either SAVE, SAVE & SEND or SAVE & NEW.
- SAVE: This will save the quote (does not send) and will bring you back to the main quotes screen.
- SAVE & SEND: This option will save and send the quote to the email address for the selected customer.
- SAVE & NEW: This option will save the current quote (does not send) and will bring you to a blank new quote. This is useful for entering multiple quotes before sending.
6. If you choose to SAVE & SEND, then you will be prompted to confirm that you want to send the quote. Select SEND. Once the customer accepts the quote, you can refer to the article How To Convert Quotes to Invoices in order to send an invoice to a customer for payment.
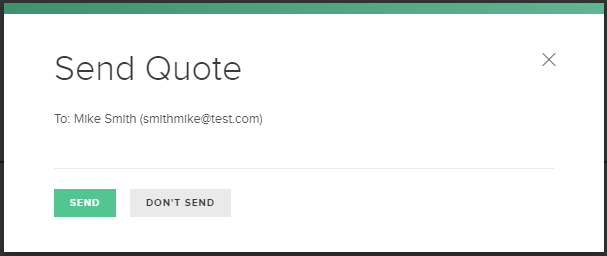
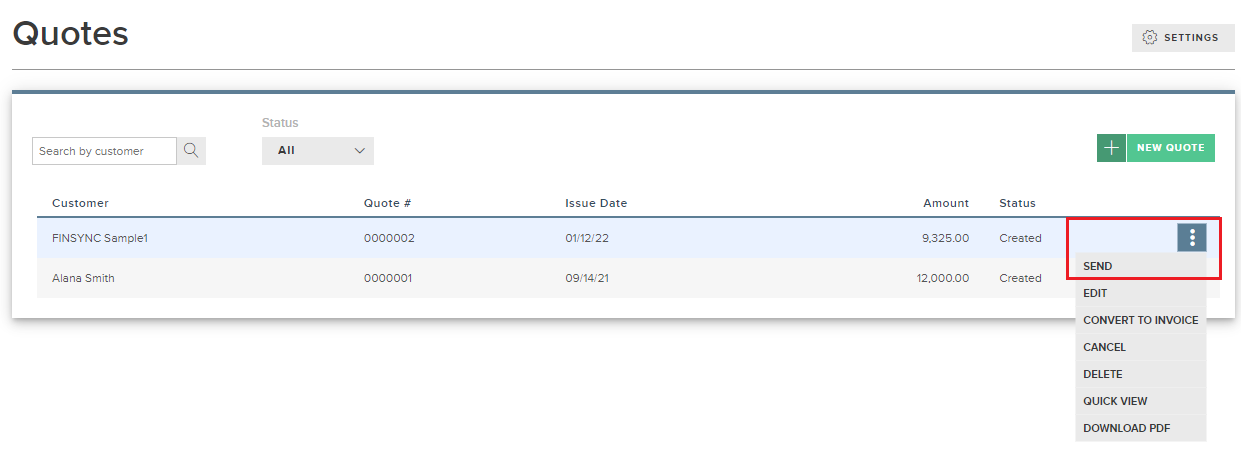
7. If you chose SAVE or SAVE & NEW, you will need to send the quote(s) when you are ready. Hover over the Ellipses (3 vertical dots) at the far right of the row. Click SEND. You will be prompted to confirm that you want to send the quote. Click SEND.
Note: Once the customer accepts the quote, you can refer to the article How To Convert Quotes to Invoices in order to submit an invoice to a customer for payment.
Related Articles:
What Your Customer Receives when you Send a Quote
How To Convert Quotes to Invoices
Adding Your Company Logo to Invoices