The article below outlines how to set up Sales Tax tracking as well as how to utilize it when Invoicing.
Setting Up Sales Tax Tracking
1. Mouse over the Company Profile Icon in the top right corner of your screen and select Profile Settings.
2. In the left hand column select Sales Tax.
3. Select the green New Sales Tax button to the right of the screen.
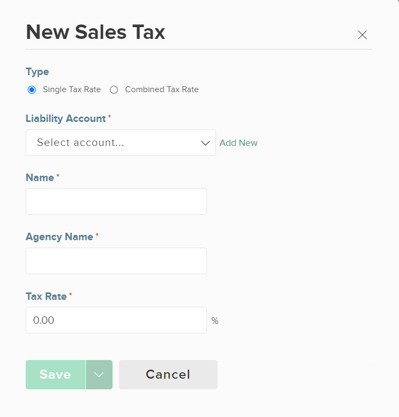
4. Complete the following Informational Fields:
- Select Single Tax Rate or Combined Tax Rate.
- Select the Liability Account for the Tax Rate. If a new Account is needed, use the green Add New button to create one. Enter an Account Name and optionally enter in an Account Number.
- Enter a Name for the Tax (This will be what appears in the drop-down on the invoice).
- Enter the Agency Name.
- Enter the Tax Rate.
6. Select the green Save button.
Selecting Sales Tax On Invoices
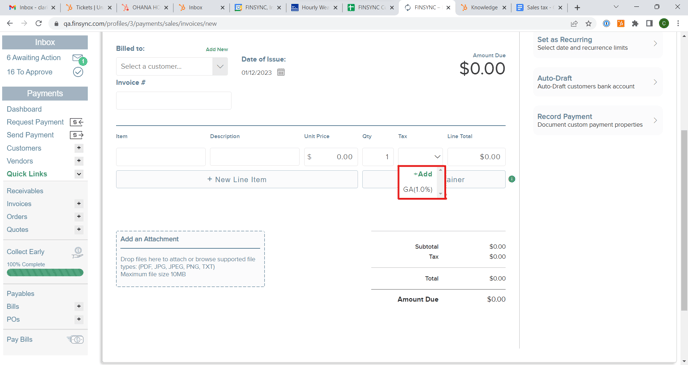
1. When creating a new Invoice, the Tax Field will now be a drop-down menu selection.
2. After making desired selection, the Invoice is Saved, the sales tax is posted to the GL Account associated with that Sales Tax item.
Sales Tax Reporting:
To run a report on the Sales Tax items, please follow the steps outlined below:
1. Click on the Reports tab in the top menu.
2. In the left-hand menu, underneath the Reports heading click on the arrow next to MORE to expand the options.
3. The Sales Tax report will be located here. The report can be downloaded as a PDF.
Related Articles:
How to Set Up & Edit Your Company Profile
How to Create and Send an Invoice
How to Create Recurring Invoices
How to Add Associates (Employees & Contractors)