How to Add Your First Bank Account in FINSYNC
One of the first steps in setting up a FINSYNC profile for your business is to add in your first bank account. Within your FINSYNC profile, there are helpful cues that are designed to walk you through the process of adding in your first bank account. This article steps through the process of adding the first account.
Note: The first bank account to be added to FINSYNC will be automatically selected as the FINSYNC Funding Account. The Funding Account is the account designated to pay for the monthly FINSYNC subscription and any accrued transactional charges. Click HERE to learn more about all FINSYNC related fees.
If you have a subscription that includes FINSYNC's Accounting or Complete Solution
Follow the steps below to add the first bank account in FINSYNC:
1. Mouse over the Company Profile Icon in the top right corner of the screen and select Profile Settings.
-1.png?width=170&height=237&name=Screenshot%20(16)-1.png)
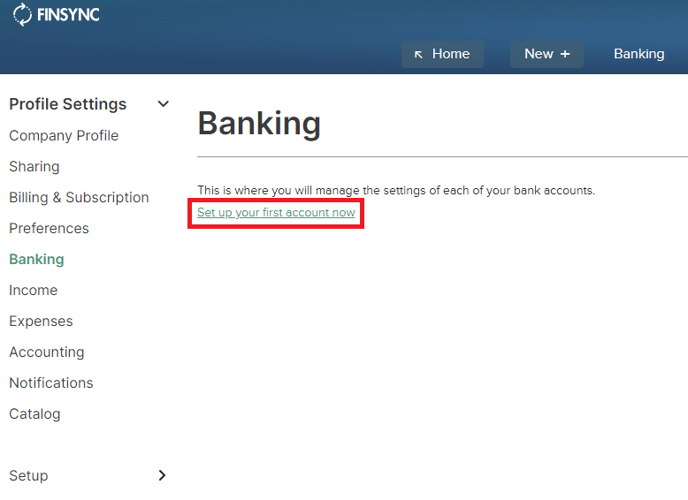
2. From the menu on the left, select Banking.
3. Within the Banking settings screen, select the link Setup your first account now:

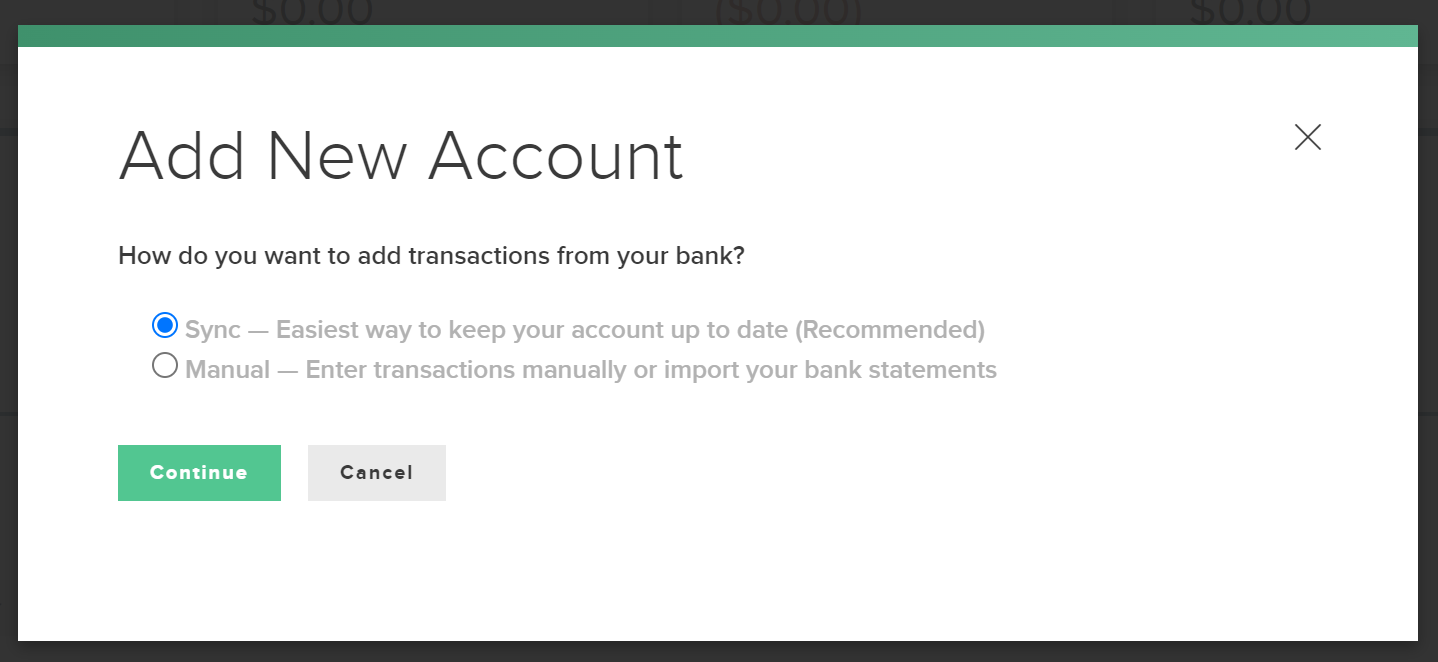
4. The Add New Account window will appear. Select Continue to Sync your bank account.

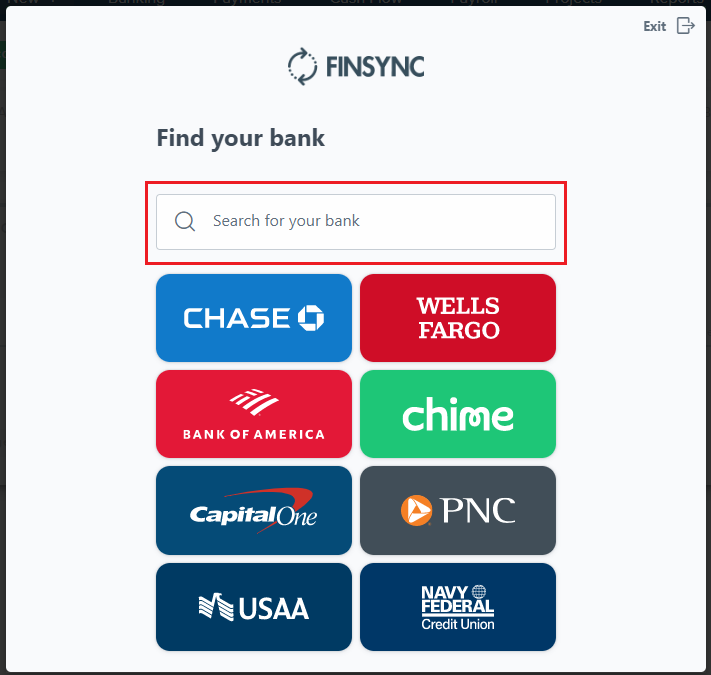
5. Search for your bank within the search field. Select your bank name and proceed with the steps to sync your account.
- Steps may vary, depending on the financial institution
- You will be prompted to enter your user ID and password to log into your bank account to sync your bank account with FINSYNC.

Congratulations! You have added and sync'd your first bank account and can proceed with any accounting, payment or payroll activities.
Related Articles: